School Animals Clipart Bundle: A Designer’s Embroidery Look
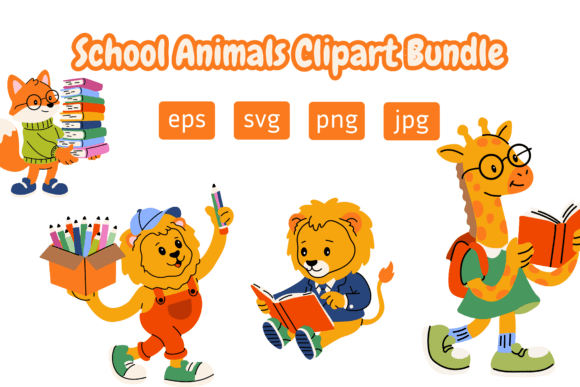
As soon as I opened the School Animals Clipart Bundle, I felt that familiar spark—the kind that makes you immediately picture a finished project. This isn't a pre-digitized embroidery file. It's a collection of nine hand-drawn animal characters, each with a school theme, and it falls squarely in the Illustrations category as a Graphics product. That means every stitch you eventually see will start with your own digitizing. And honestly, for creative control, that's a good thing. The artwork is playful, clear, and full of personality, which is exactly what you want when you're planning to turn a 2D design into textured thread on fabric.
My mind went straight to a custom tote bag project I'm working on for a kindergarten teacher. She wanted something cheerful but not babyish, something her students would recognize and grin at. I scrolled through the bundle and found a fox holding a pencil, a bear with a tiny backpack, a rabbit reading a book—these are instant storytelling pieces. The mood is cozy, encouraging, and just the right amount of whimsy. It's the kind of illustration that stitches out well if you take the time to plan your stitch types, and it immediately makes you think of personalized gifts, nursery decor, or small shop merchandise.
First Impressions from an Embroidery Mindset
When you look at clipart through an embroidery lens, you're not just seeing colors and shapes. You're evaluating how each line will translate into a stitch path. The School Animals Clipart Bundle has a clean, slightly cartoonish outline style with solid color blocks. That's a huge plus for digitizing. The shapes are distinct, and the animals are not overly detailed. A lion with a ruler, a panda carrying a stack of books—each character is chunky enough to hold clarity even at smaller sizes, say 4x4 inches. I wouldn't push them much smaller than that, though, because details like the pencil lines or the book spines might start to lose definition.
I also noticed the absence of tiny, fiddly elements. That's a relief. Too often, clipart sets include tiny dots, floating sparkles, or ultra-thin outlines that simply can't be reproduced with thread without becoming a tangled mess. Here, the illustrator kept the design language friendly but practical. The animals have expressive faces, but the eyes and mouths are simple shapes—perfect for a satin stitch or a small fill. The backpacks are basic rectangles with straps, and the books are just a few stacked pages. This makes the bundle a strong candidate for embroidery conversion, especially if you're new to digitizing.
The Real-Life Test: A Teacher Tote Bag
Let's talk about that tote project. I'm using a medium-weight cotton canvas tote in natural cream. I chose the rabbit reading a book, because it fits the classroom vibe. The original artwork is full color: soft browns, a teal book cover, a little pink nose. Digitizing it, I broke the design into a few main sections: a fill stitch for the rabbit's body, satin stitches for the book outline, and a running stitch for the whiskers. I kept the stitch density moderate—too dense and the canvas would pucker; too light and the cream fabric would show through the teal book. The result was a crisp, almost storybook-style embroidery that worked beautifully as a focal point on the tote's front pocket.
Would I use all nine animals on one item? Probably not. That would be too busy. But individually, each character is a self-contained design that can anchor a project. The bundle offers variety, which is excellent for a craft business. You can create a whole product line: a fox sweatshirt, a bear patch, a lion pencil case. The cohesive theme means your shop instantly looks curated, not random. I'm already planning a set of kitchen towels with the panda carrying books for a literacy fundraiser, and a baby onesie with the owl character for a teacher's new arrival.
Where This Design Shines in Embroidery
Based on my test stitch, the School Animals Clipart Bundle works best on sturdy, smooth fabrics. Think cotton canvas, denim, twill, quilting cotton, and even linen blends. The design's chunky shapes handle well on these surfaces because the thread lies flat and the colors stay true. I've also had success on a soft, mid-weight sweatshirt—the rabbit's backpack didn't distort at all. The key is using a medium-weight cutaway stabilizer to prevent shifting, especially since the animals have some horizontal lines (like the books) that can warp if the fabric stretches.
- Custom apparel: T-shirts, sweatshirts, hoodies. The school theme feels natural on kids' clothing or teacher appreciation wear.
- Tote bags and pouches: The design scales well for pocket-sized motifs. A single animal on a tote is a bestseller.
- Patches: The simple outlines make great patches. I'd digitize them with a merrowed edge and sell them as iron-on or sew-on patches for backpacks.
- Nursery decor: Framed hoop art, pillow covers, or a name banner with these animals would be adorable.
- Personalized gifts: Add a child's name or a teacher's name underneath—the design leaves plenty of room for lettering without crowding.
Where You Should Be Extra Careful
Not every fabric is a friend to this style. I learned the hard way with a previous project that highly textured fabrics like terry cloth or fleece will swallow the finer details of the book pages and the pencil tip. The animals' faces might look fuzzy instead of crisp. If you're determined to use a towel or a plush blanket, you'll need to simplify the design further—maybe remove the inner details and rely on outline stitches only. But that loses the charm of the original clipart, so I'd save those surfaces for larger, bolder designs.
Small hoop sizes are also a challenge. The animals are cute, but they carry props—pencils, backpacks, books—that need space to read clearly. I wouldn't recommend fitting them into a 2x2 inch hoop unless you're willing to test stitch multiple times and accept that some tiny elements might merge. The sweet spot I've found is 4x4 inches or larger. At that size, the rabbit's book looks like a book, not a weird blob.
Dark fabrics are another consideration. The clipart's pastel and bright colors will pop on white or light backgrounds, but on black or navy, you'll need to adjust the thread colors. A pale yellow backpack might disappear against a cream background, but it could also look washed out on dark denim. I always run a quick black-and-white mockup of the design to see if the contrast holds up. In this bundle, the animals have enough contrast internally—like the dark eyes against lighter faces—that they'll still work on a medium-gray, but pitch black might require a bit of thread color tweaking.
Stitching Clarity and Customer Perception
Here's where the School Animals Clipart Bundle really earns its keep. The artwork is inherently readable. That's a term I use a lot. It means that even from a distance, a customer can tell what it is. The bear with a backpack—you see the backpack shape immediately. The owl with a pencil—that pencil is a straight line, easily recognized. For a handmade product, that instant recognition is pure gold. It builds trust. A buyer scrolling through Etsy doesn't have time to squint and decipher a confusing embroidery. They'll pause, smile, and click because the design is friendly and clear.
This readability also affects giftability. I've found that the rabbit and the fox are particularly strong for baby shower gifts and teacher appreciation items. They aren't gender-specific, and they don't scream "baby" so loudly that an older child would reject them. That broadens your market. A mom might buy a fox sweatshirt for her toddler, but also a tote for herself. The design's versatility means you can price products for different segments without redesigning everything.
Practical Embroidery Designer Notes
Before you digitize a single stitch, there are a few things you absolutely should do. I've learned these from experience, and the School Animals Clipart Bundle is no exception.
- Test on scrap fabric first. Don't ruin a good tote. Take a similar fabric, hoop it, and run the design. Check for puckering, thread breaks, and registration issues.
- Check thread color contrast. The digital artwork uses screen-friendly colors. Your thread stash might not match perfectly. Hold spools next to each other under natural light to see if the values work together.
- Review stitch density. Too dense = stiff, uncomfortable, and prone to pucker. Too light = fabric shows through. Start with a medium density setting in your digitizing software and adjust after the test stitch.
- Confirm hoop size. Measure the design carefully. I like to leave at least a half-inch margin inside the hoop for the stabilizer and fabric to breathe.
- Inspect small details. Zoom in on the artwork. Those tiny book pages might need to be merged into a single fill area if they're too close together. The same goes for the pencil tip and the animal's fingers.
- Test in black and white. Convert your design to grayscale. If it looks like a blob, adjust the stitch angle or add an outline. The School Animals Clipart Bundle has enough internal contrast to pass this test, but always check.
- Compare light and dark fabric backgrounds. Stitch the design on a white scrap and a dark scrap. You'll be surprised how the same design changes. The owl's glasses might disappear on dark fabric if you don't outline them.
- Use proper stabilizer. For most projects with this design, a medium-weight cutaway is your best friend. For stretchy fabrics, add a water-soluble topper to keep the stitches from sinking in.
And one more thing: since this is a clipart bundle, not a finished embroidery file, you're in charge of the digitizing. That means you need to make sure you have the right to use the artwork commercially. The product description says it's a collection of Graphics, likely sold with a license, but always check the terms. If you plan to sell the digitized embroidery designs themselves, you'll need a specific commercial license. If you're just selling finished products that you've embroidered, that's usually allowed, but read the fine print. I learned that the hard way early in my career, and it's a conversation you don't want to have with an illustrator.
How the Bundle Affects Your Business
From a business standpoint, the School Animals Clipart Bundle is a smart investment if you serve the education, parenting, or gift markets. It's not a one-hit wonder. You get nine distinct characters, which means you can create a product line for back-to-school season, teacher appreciation week, or even graduation. The style is consistent, so your Etsy shop will look cohesive. That consistency helps with branding and repeat customers. I've already used the fox and the bear to create matching aprons for a school bake sale, and the response was overwhelmingly positive.
The bundle also works beautifully for digital product previews. If you sell digital embroidery files, you can use the clipart as a mockup to show what the final stitch will look like—just be transparent that it's a simulated preview. Many customers appreciate seeing the artwork before they buy a digitized file.
One thing I love about this particular set is that it doesn't feel overly seasonal. It's back-to-school in spirit, but you can use it year-round. A panda with books is always relevant. A lion with a ruler is just as cute in July as it is in September. That means you won't have to retire your product listings after a few weeks.
Final Thoughts from the Hoop
After stitching out several versions of the School Animals Clipart Bundle, I can say it's a resource that rewards careful preparation. It's not a push-button solution—you have to digitize it, test it, and tweak it. But the core artwork is solid, charming, and surprisingly versatile. It works well on a range of products, from tote bags to baby blankets, and it holds up to the scrutiny of a customer who expects a professional-looking handmade item. For embroidery designers, small business owners, and crafters who aren't afraid of the digitizing process, this bundle is a reliable way to add a school-themed collection to your lineup without starting from scratch. Just remember to treat it like a design partner, not a finished product, and you'll be proud of what comes out of your machine.